Assigning cases is a crucial aspect of managing issues within a company. In a service desk department, the structure often consists of agents and team leads, with the service desk divided into specific departments with various specializations such as finance, technical issues, and client contracts. Imagine a scenario where a finance-related case is assigned to someone without financial knowledge. This could lead to bad customer feedback, unresolved issues, and usually escalations affecting the agent’s perception. Service Cloud comes to the rescue here. Let us start with the basics of ownership, which I briefly mentioned earlier. Ownership is the responsibility for a specific case. Incoming cases cannot wait indefinitely for someone to accept them, leading to two scenarios:
- The team leader takes care of the assignment, which can cause delays as even leads need breaks
- Service Cloud handles the assignment without needing breaks
What to use for case assignment? Queues can be a starting point. Queues in Service Cloud have been offered as a solution by SF from the beginning. Their role is to manage cases, tasks, work orders, or other records that will be resolved by the customer service team or another department. Queues allow for not having to decide which agent to assign a case to; instead, cases can be assigned to a queue to which a specialized group of agents was previously assigned. Some undeniable benefits of having queues in Service Cloud include the following:
- Grouping records allows for adding cases to a specific queue without going into detail, letting a team leader assign a record to a queue where agents can then thoroughly review the case and determine its priority, the type of inquiry, and so on
- Case assignment: Options in queues include manual assignment, where a case can be assigned by a system user, or automatically using automatic case assignment rules
- Increased efficiency: Queues allow for the quick identification and assignment of tasks, speeding up case management and enhancing team productivity
The following is a quick guide to creating your queue:
- Start where you always do, by entering Setup or Service Setup (either will work).
- Go to your favorite spot – the Quick Find Box, and type in Queue.
- The system will search for queues and highlight the found setting. Click on the search result.
- Then press the New button on the page.
- Now the fun begins. A page with all the settings related to queues will open, looking like the following screenshot.
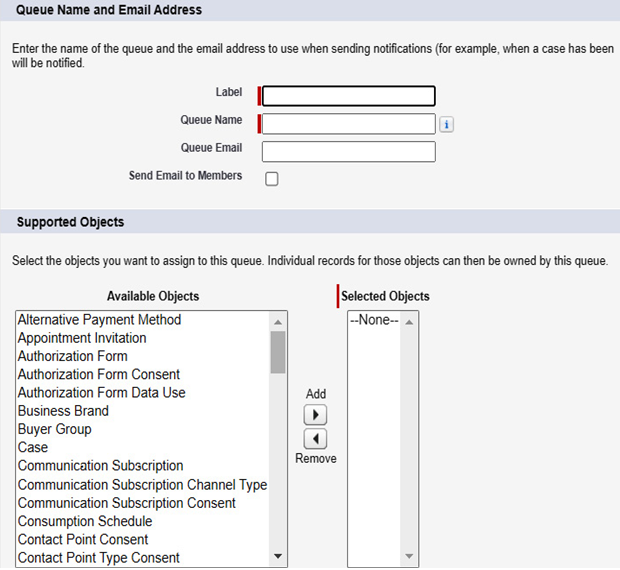
Figure 10.7: Queue settings
- At the start, we have the Label field, where we set the label for our queue. Next are Queue Name and Queue Email. Email addresses are necessary to inform users assigned to the queue that a new case has arrived for them. The last option is a checkbox to activate the sending of informational emails to users.
- In the next part of the page, we have Supported Objects. Here, we set which records can be assigned to a particular queue. As you can see, not all objects are available; Account and Contact will not be found here, but objects like Case, Invoice, or Order will be.
- The last setting involves assigning Users, Public Groups, Roles and Roles and Internal Subordinates to the queue, as in the following screenshot.
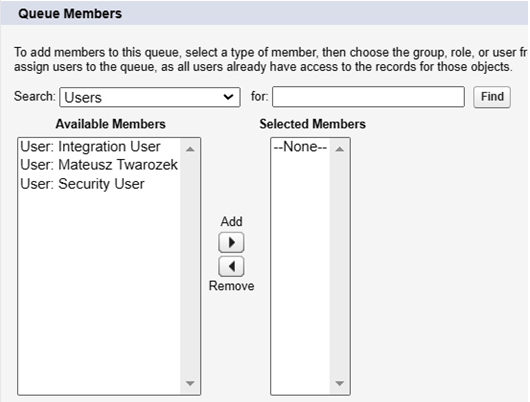
Figure 10.8: Queue members